Header

Header

Search This Blog

Showing posts with label KKCenterHK. Show all posts

Monday, March 10, 2014

Review: KKCenterHK Water Transfer Stickers

Sponsored | Bought Myself | Press Sample | Nothing to Disclose | Giveaway Winnings

Over the weekend I tried out the Cute Dot and Bow water transfer stickers from KKCenterHK. Basically they are just like water decals, the are just made to cover your whole nail.

It comes with a strip of 12 water transfer stickers (decals) and a 'smoothing tool' which is just a small nail file. Below is what the strip looked like after I had cut the individual decals.


The directions say to clean, cut & trim to fit, soak & apply, smooth and apply top coat. It also says to peel off the protective film, but there was no protective film on mine. So I followed all the directions and the decal would not stay on my nail, it just kept sliding off, so I went to their website to see if there were any tips. On their website it says to soak the decal for 10-15 minutes, ain't nobody got time for that LOL and they will come off a lot sooner. It also says to dry the decal off with something so I used a cotton ball, it did help keep it from sliding around, but it still did not adhere to my nail. The second issue I had was the decals were so long and my nails are not, so most of the bow got trimmed off.


For me these were a fail, I didn't ever bother with putting top coat on them, I just took the photo and peeled them off. The packaging says by applying a top coat the decals will last up to 7 days, and only 1-2 days with out. Maybe they would have worked better if I had applied a base coat, the instructions did not say anything about it so I didn't do it. I also think they should have a long and short version so us nubby girls could use these too with out loosing any details.

KKCenterHK's Full Water decals cost $7.20

If you shop at KKCenterHK you can save 10% off your order with this coupon code: SBB2013

Monday, March 3, 2014

NOTD: Salon Perfect Bermuda Baby & KleanColor Metallic Pink

Sponsored | Bought Myself | Press Sample | Nothing to Disclose | Giveaway Winnings

Today I have for you Salon Perfect Bermuda Baby stamped with KleanColor Metallic Pink. The plate I used for this look I received from KKCenterHK for review and it is N.NAIL Stamping Image Stamp Template Plate SPPMB65. I love all the designs on this plate, but I chose to use the bigger lines and swirls one (the one right unter the N.Nail label). It does have a little tiny place where the etching is messed up, but it did not affect the transfer of the image to the stamper or to my nail.


I used Bermuda Baby for my base and it is a beautiful light neon blue, that my hubby picked out and brought home for me. In the bottle you can see some purple/pink shimmer, not sure if that transferred to my nail since I covered it up with a stamp. Bermuda Baby dries to a matte finish, but if you like the color but not the matte finish just apply a shiny top coat and no one will ever know the difference :)

As mentioned above I did use Metallic Pink from KleanColor to stamp with. I have found that these metallic polishes are good for stamping but you have to work fast since they dry pretty quick. 

Since I wanted this look to be completely matte I topped everything off with my NYC Matte Me Crazy top coat. I think I should have let it dry a little longer before I took the photo, because to me it still looks a little shiny. I also think this looks much better in person just because I could not get my camera or my iPhone to capture the actual color of Bermuda Baby. The photo I took with my phone (bottom image) is closer to the actual shades.


Not overly excited about this mani. I think it would have looked better with different colors. Maybe Black and Gold.

If you shop at KKCenterHK you can save 10% off your order with this coupon code: SBB2013

Saturday, January 18, 2014

Review: KKCenterHK Foil

Sponsored | Bought Myself | Press Sample | Nothing to Disclose | Giveaway Winnings

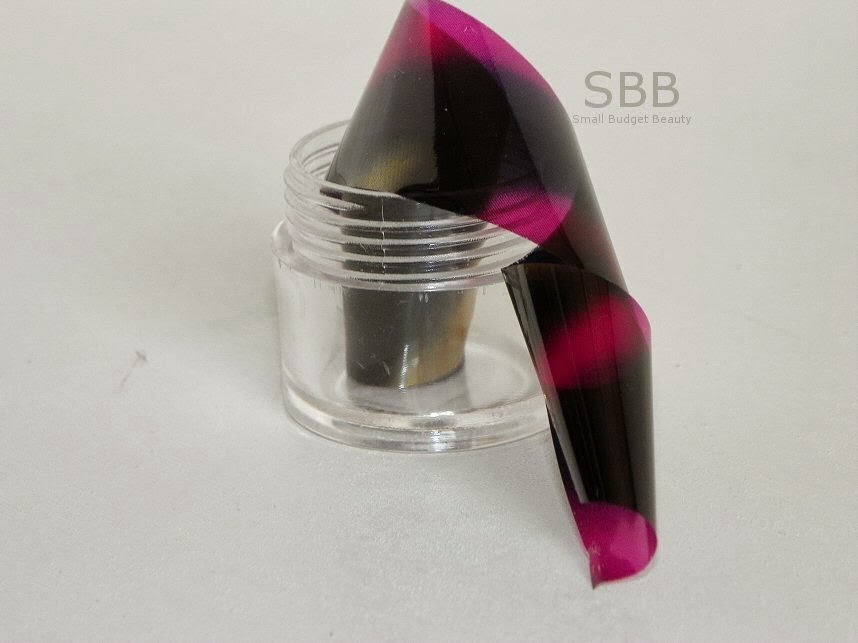
KKCenterHK sent me some nail foil to try out and review. The foil that I picked out was the Purple Gold Black Irregular Nail Foil Transfer, I thought I would get a cool gradient effect with just a little bit of work. I was really excited to give this a try, as I have been wanting to for quite sometime. 


You get a pretty good amount of foil it a plastic container. Just cut off the amount you need for your manicure.


With the roll of foil I also received a small bottle of adhesive to use with it. The foil alone costs $6.92 if you want a bottle of glue with it the cost is $8.86 (small bottle) or $10.80 (larger bottle). Basically you are supposed to 'paint' your nail with this adhesive, wait for it to dry a little, so it's tacky then you place the foil over your nail and use your finger to smooth out the foil. When you lift the foil sheet off your nail it should have transferred to it and give you a really cool looking nail. 

I tried and tried to get this product to work great for me, but I feel like it was a total fail. I feel as though I did everything properly, but still could not get it to look good. I could not get a seamless transfer, I would have to go back and fill in spaces where the foil did not adhere to. Maybe it's not supposed to fully cover your nail? I don't know.


I took photos of my nails when I used this product and accidentally erased them off my SD card before I got them put on my computer, thus the reason for the nail wheel. I found this process to be slightly messy on account of the glue so I opted to just 'swatch' it if you will on the nail wheel instead of on my nails.

Even though the glue was just tacky when I placed the foil down, it make the finished product on my nails feel tacky as well. Foiling nails apparently is just not for me.

Have you tired nail foil?  Any tips to make it work better?

If you shop at KKCenterHK you can save 10% off your order with this coupon code: SBB2013

Thursday, January 9, 2014

Review: KKCenterHK 2.5mm Circle Glitter

Sponsored | Bought Myself | Press Sample | Nothing to Disclose | Giveaway Winnings


Today I am reviewing the N.NAIL 2.5mm Circle Glitter-Gold Dark Khaki from KKCenterHK, they have a wide range of nail art supplies at awesome prices!

These little glitters are made from plastic and were super easy to work with. I started off by painting my nails with a base coat, then I applied two coats of Creative Fantasy by China Glaze. After my first two coats had dried I applied a third coat to one nail and then used some nail art tweezers to pick up the gold glitters and place them on my nail. After I did that to each nail I applied my NYC quick drying top coat and noticed that the glitters still looked raised up from my nails so I added another top coat, but in the end some of the glitters still looked raised up.


They were very easy for me to pick up with the tweezers and place on my nails, I do wish they would have set farther down on my nails so they would not have been raised up because this caused me to

Saturday, November 16, 2013

NOTD: Square Studs

Sponsored | Bought Myself | Press Sample | Nothing to Disclose | Giveaway Winnings

Here lately I have been getting more and more into nail art and have been loving the looks of nail studs. The ones I am using today come from KKCenterHK and are called N.NAIL Studs Square Laser Purple 3mm. I have tried round nail studs before and liked them, but I really like the looks of the square ones, I feel you can do more with them. The only problem I have with these is I tend to fidget with the studs until they fall off.

I really love the purple holographic look that these have!


I decided to use Fing'rs Heart 2 Art Stop Metalling in My Business for my base color and made a simple look using the studs.


I'm considering trying these with either a black cream polish or a purple cream polish.


Take 10% off your order with coupon code SBB2013

Friday, November 15, 2013

Review: KKCenterHK Rubber Stamping Plate

Sponsored | Bought Myself | Press Sample | Nothing to Disclose | Giveaway Winnings


I have seen these rubber stamping plates while browsing on the web and I had always wondered about them, so I decided to give one a try. I got the N.NAIL Heart Rainbow Kiss Star Flower Footprint Soft Stamping from KKCenterHK. The tops of the plates are made of plastic and then the bottom side of the plates are made of soft rubber. 


These plates work a little different from the metal ones, you still apply polish directly to the plate, but instead of using a scraper you just wipe the whole plate across a paper towel to get rid of the excess polish. I had to wipe the plate a couple of times to ensure that all the excess was gone, but I still ended up with what looks like smudge marks on my nails from a little bit that was left on the plate that I could not get off. After you have wiped the plate off you take the plate and use it as your stamper to stamp the design on your nail.

I feel like I need a little more practice with these types of plates before I can get my stamping to look good. Just like when I started stamping using the metal plates, I needed practice for that too :) I will say I like these rubber plates because I feel like there is less clean up, you don't have to bothering with scrapping it with the scrapper then cleaning that off each time, then having to clean the plate and the stamper. Much easier to have it all in one. I would also recommend that before using the plate you take a Q-tip with some polish remover on it and give it a good swipe to get any lint off that may be clinging to it.

Here is the look I got with my very first time using this plate. I'm sure you will be seeing me use this plate in more nail art posts.


Base color is Duri Grey Area and for my stamping I used Sinful Colors Snow Me White
Have you used stamping plates like this before?


Take 10% off your order with coupon code SBB2013

Tuesday, October 15, 2013

Nail of the Day: KKCenterHK Water Decals

Sponsored | Bought Myself | Press Sample | Nothing to Disclose | Giveaway Winnings

Today I have a cute nail look to share with you using Blue Feet water decals from KKCenterHK. The set came with 26 decals, 13 blue feet and 13 green feet. I chose to use the blue for this nail look.

I used Sally Hansen Blue Me Away! for my base on three fingers and Sinful Colors Snow Me White for my accent nail, to help the decal stand out better. After placing the decal on I thought my other fingers looked too plain, so I used a dotting tool to add a few dots to my other fingers. I really like the look I got, just something cute and fun.

This was the first time I had ever used water decals like this, so it took me a few tries before I got it right. The decal kept wanting to curl up on me, I was using tweezers and I think it would have been better to just slide it off with my finger then placed it on my nail. I will be giving these another try. They are just too cute!

Have you used water decals before? What is the best way to do them in your opinion?


 Take 10% off your order with coupon code: SBB2013

Sunday, September 29, 2013

Nail of the Day: KKCenterHK Ebalay Warm Orange Shiny Glitter

Sponsored | Bought Myself | Press Sample | Nothing to Disclose | Giveaway Winnings

Today's post is a NOTD plus a mini review of EBALAY Warm Orange Shiny Glitter Nail Polish that I received from KKCenterHK for review.

I had some difficulty with this polish, I tried several different base colors with it, from white, orange, black, blue and several shades of purple and could not find a color that looked good with it. In the end I opted to do a jelly sandwich with it using Wet n Wild's 2% Milk and really liked the results.

The Ebalay polish is a clear base full of white and orange hex glitters, white bar glitters and some purple iridescent glitters as well. The polish it's self is a nice polish, does take a little extra time to dry, but that may also be because I felt like I put heavy coats of polish on in order to get a good amount of 'glitter' on my nails. The glitter was slightly hard to work with. I think it looks amazing in the bottle, just not so much on my nails.


Application: 3/5
Drying Time: 3/5
Longevity: 3/5
Overall: 9/15

                       Take 10% of your order with coupon code: SBB2013


Sunday, July 14, 2013

Review: Flower Geometry US Heart Checked Stripe Stamping Plate from KKCenterHK

SponsoredBought Myself | Press Sample | Nothing to Disclose

KKCenterHK sent me the Flower Geometry US Heart Checked Stripe Stamping Plate to try out and review. I don't know if these usually come with the stamper/scrapper but I received one of these also.

I have used stamping plates from other brands quite a bit and I think I'm pretty good at stamping when I have good supplies to work with. I don't think this plate is as good of quality as say a Konad plate or a Mash plate. It is kind of flimsy, I can bend the plate with my hands and the edges are very rough, they feel like a dull knife edge. The stamping part of the stamper/scrapper worked really good, the scrapper side on the other hand was terrible. I would drop my polish on the plate and try to scrape it and it did nothing as you will see in the photos below. In order to get a clear design I had to end up scrapping with a gift card and I also used the scraper that came with the salon express stamping kit. I also used a cotton ball to wipe the polish off the scrapper and it actually fell apart! I was able to get it back together, but still it broke. I was able to get the image to stamp clearly.

I would not buy any of these plates, I would rather head over to Amazon and get a Konad or Mash plate.

I hate to give bad reviews of products, but I will always be 100% honest about how a product works for me, regardless if I bought it or if it was sent to me for free.
Scrapper that was supplied did not scrape the plate properly.
A gift card worked well
as did a scrapper from another kit
Image on the stamper
Scrapper/Stamper broke when I wiped it with a cotton ball to remove polish
finished nail look
Use this coupon code to save 10% off: SBB2013

Tuesday, June 25, 2013

Review: Nail Studs from KKCenterHK

KKCenterHK sent me some Circular 1.5 mm circular nail art studs to try out and review. I have never used any studs for manicures before so this was a fun product to try out and a good challenge for me. The studs were quite easy to pick up with a pair of tweezers and place on the nail. The only difficulty I had was that my polish had dried to much and was not as tacky as I would have liked it to be. I really like that these studs are pretty flat on the bottom so they sit low on the nails. I was amazed at how well these studs stayed on my nails. I honestly thought I would hit my nail over something and they would fall right off, I was so wrong. I even tried to pick them off with my fingernail and could not. I am very pleased with these studs and looking forward to creating a couple more manicures with them. They are small in size, but I have short nails so they worked great for me. They come 50 to a pack.

The studs were super easy to remove and I was actually able to keep some of them to reuse! I don't know if they were designed to be reused or not, but if you want to take the time to pick them off the cotton ball you can reuse them and you can't even tell that they had been used before.

Studs can be purchased for $4.23 a pack. They have a wide variety of studs and nail decorations to choose from.

Now on to the manicure I used Maybelline Color Show in Amethyst Ablaze and sealed everything in with a top coat from NYC.


Would you or have you used nail studs?

Take 10% of your order with coupon code: SBB2013


Related Posts Plugin for WordPress, Blogger...